Saturday, April 3, 2010

An Easter Card For Him

I've been feeling very inspired and excited about creating things, so instead of buying a card for my husband this Easter, I decided to make him one. He is very excited about the fact that I've been so into my crafts lately. He majored in art and happens to like my style, so I know he's going to love this. Plus, he's more sentimental than even I am and will appreciate the time put into it. So here's what I came up with...

Taa Daaa!!!

You can make one too! Here's how:

What you'll need:

Coordinating pieces of scrapbook paper/card stock in earthy tones

ribbon

1 small brad

scissors

pin

Pen/marker

distressing ink

paper towel

Tape

Glue

paper cutter (optional)

rub-on wording (optional)


  1. I almost forgot to take pictures (shame on me!) so forgive me for throwing several steps into one... On a piece of card stock, draw out two separate designs, one to fit inside the other. Cut it out and distress the edges. On the back, draw out the shape you would like to follow for your pin pricking. I followed the same pattern for my smaller shape and then drew a more intricate design on the larger one. When finished, use a pin to poke holes along the line to make your design on the paper. Adhere the smaller shape in the center of the larger one.
  2. Cut out some of the basic shapes to use on the front (two rectangles, one to place inside the other), a piece of ribbon, and your actual card base. You’ll want to make sure that the rectangles are the same width as the card.
  3. Cut out different flower shapes on four separate pieces of paper.
  4. Distress the edges on each layer and attach them together with a brad.
  5. Attach the flower to the pin pricked shapes you made in step 1 with the brad.
  6. Take the rectangles that you cut out in step 2 and distress them. Then adhere the smaller rectangle to the larger one and wrap the ribbon around them, securing the ribbon on the back with tape.
  7. Attach your rectangles to the front of the card. Distress outer edges.
  8. Adhere your flower and pin pricked shapes to the card over your rectangles. Use rub on transfer or embellishment on the bottom right hand corner.
  9. Cut out two rectangles of the same size, just slightly smaller than the card. Distress the edges and attach them to the insides of the card. Using another piece of paper, write or type out desired text. Distress the edges and attach to the inside of the card. I used a scripture verse relating to the holiday on the left side and my own personal sentiment on the right.
  10. Using another piece of card stock, place your card in the center and trace the edges. Draw lines from the edges of where the card was traced to the outside edge of the card stock in a very slight “V” shape. Note: the card will be thick so you’ll want to make the envelope slightly larger. I added about 1/2 cm to all sides of the traced shape.
  11. Fold all four flaps in towards the center, starting with the sides, followed by the bottom and then the top. Glue along overlap on the bottom flap.
  12. Use an embellishment or seal to close the envelope. I had a ton of wax and a stamp with our initial left over from our wedding so I used that.
  13. Use some of the left over scraps to cut into rectangular shapes. Distress the edges on both the paper scraps and the envelope. Write the name of the recipient on one of the scraps and attach them all to the front of the envelope.
  14. Feel good about yourself... you did something thoughtful for someone you love =)

Friday, April 2, 2010

Resurrection Cookies

Easter will be here in just a few days and I'm looking forward to making resurrection cookies with Eli... a tradition that I plan to start this year with my family and continue until my son (and children to come) are grown. Since I haven't actually made them yet, I don't have any photos to share, but I thought I'd post the recipe incase any of you would like to try it this weekend with your little ones.

What you'll need:
3 egg whites
1 cup whole pecans
1 tsp. vinegar
A pinch of salt
1 cup sugar
Zipper baggie
Wooden spoon
Tape
Bible

Preheat oven to 300 degrees. Make sure you preheat! This recipe will not work if you wait until halfway through the recipe to turn the oven on.

Place pecans in zipper baggie and let your children beat them with the wooden spoon to break into little pieces. Explain that after Jesus was arrested, He was beaten by the Roman soldiers.
Read John 19:1-3

Let each child smell the vinegar. Put 1 tsp. vinegar into the mixing bowl. Explain that when Jesus was thirsty on the cross, He was given vinegar to drink.
Read John 19:28-30

Add egg whites to vinegar. Eggs represent life. Explain that Jesus gave His life to give us life.
Read John 10:10-11

Sprinkle a little salt into each child's hand. Let them taste it and brush the rest off into the bowl. Explain that this represents the salty tears shed by Jesus' followers and the bitterness of our own sin.
Read Luke 23:27

So far, the ingredients are not very appetizing. Add 1 cup of sugar. Explain that the sweetest part of the story is that Jesus died because He loves us. He wants us to know and belong to Him.
Read Psalm 34:8 and John 3:16

Beat with a mixer on high speed until stiff peaks begin to form (anywhere from 10 to 15 minutes). Explain that the color white represents purity in God's eyes for those whose sins have been cleansed by Jesus.
Read Isaiah 1:18 and John 3:1-3

Fold in broken nuts. Drop by teaspoons onto wax paper-covered cookie sheet. Explain that the mounds represent the rocky tomb where Jesus' body was laid.
Read Matthew 27:57-60

Put the cookie sheet in the oven, close the door and turn the oven off. Give each child a piece of tape and seal the oven door. Explain that Jesus' tomb was sealed.
Read Matthew 27:65-66

Go to Bed. Explain that just like they may be sad to have to leave the cookies in the oven overnight, Jesus' followers were in despair when the tomb was sealed.
Read John 16:20 and 22

On resurrection morning, open the oven and give everyone a cookie. Notice the cracked surface and take a bite. The cookies are hollow! (or at least they should be). On the morning that Jesus was resurrected, His followers were amazed to find the tomb open and empty.
Read Matthew 28:1-9

He has Risen! Praise the Lord!

Thursday, April 1, 2010

The Heart Of A Little Man

I love being a stay at home mom. I mean, I really love it. I love watching Elijah as he consistently learns new things. I love seeing his face light up when he knows he's done something that makes me happy. I love watching him explore and discover. This love brought me to today's blog. It's a little different than my usual post, but I wanted to share my heart with you.


Genesis 1:7 tells us that God has created us in His image. Since none of us can actually be God in His entirety, He has created each of us to play our separate roles. By looking at His creation as a whole, we get a glimpse of His depth. I love seeing the differences in men and women. I know many think I'm old fashioned, but I firmly believe that God created men for specific purposes and He created women for specific purposes and gave us certain characteristics that aid us for those purposes. For example, men always feel the need to provide for their families and to protect. Women feel the need to nurture and nest. This also plays into the whole men being logical and women being emotional deal. When we live out the calling that God has placed on our lives, it results in true beauty. In the book Created To Be His Help Meet, Debi Pearl so perfectly states that:


"If you are a wife, you were created to fill a need, and in that capacity you are a "good thing," a helper suited to the needs of a man. This is how God created you and it is your purpose for existing. You are, by nature, equipped in every way to be your man's helper. You are inferior to none as long as you function within your created nature, for no man can do your job, and no man is complete without his wife. You were created to make him complete, not to seek personal fulfillment parallel to him. A woman trying to function like a man is as ridiculous as a man trying to be like a woman. A unisex society is a senseless society - a society dangerously out of order."


I find so much joy in being a help meet to my husband and have been so blessed to be able to stay at home doing what I can to assist him in being the man God created him to be and raising our son to have the same beliefs. John Elderedge states that "In the heart of every man is a desperate desire for a battle to fight, an adventure to live, and a beauty to rescue," in his book Wild at Heart. In the days that I spend with my precious boy, I can already see these core desires taking root in his little heart and it makes me smile.


Being the loving mommy that I am, I of course want to give my son the desires of his heart, so today I made Elijah his own fort... an adventure to live:


He loved it!


Afterwards, we shared an ice cream sandwich...


It has been a good day.


Wednesday, March 31, 2010

I Want Candy...

After a busy morning of lots of cleaning, some embroidering (working on a project that I'm hoping to be able to share next week), some eating, and some mommy-ing I took a trip to Jo-Ann's and came home with candy molds to make my own gummies!

While browsing the Not So Idle Hands blog by Emily, I came across a recipe for easy peasy gummy candy and couldn't wait to try it! (I do encourage you to jump on over to Emily's blog... her pictures are much prettier than mine ;0)


Ingredients:
2 three oz. packages of flavored Jello (I used raspberry)
6 envelopes of Knox unflavored gelatin
2/3 cup of cold water + half of 1/3 cup (Weird measurement, I know. Half of 1/3 cup could also be thought of as 2 1/2 tbsp + 1/2 tsp.)
Candy molds


I used Emily's idea of mixing everything in my pyrex measuring cup to use later as my double-boiler. So first, you'll want to measure out your water and slowly add all the gelatin and Jello. Make sure you add just a little at a time and stir before adding more.

Once all the Jello and gelatin have been added, cover it and let it sit for 10 minutes. While it sits, you can start boiling some water in a pot. After the 10 minutes are up, it should be thick. (Ignore the disgusting hard water spots on my dish... should have hand washed it. Ick)

Eli wanted to be a good little helper, so he searched for the perfect pot...


Next, put the glass measuring cup into the simmering water and let the mixture melt. Make sure you don't cook or burn it... just melt it (hence the double-boiler).


After it's completely melted you can pour it into your molds. This is when having it in the measuring cup really helps! You'll want to be quick, because the goo will start to set in your measuring cup if it sits for too long.

Now you can put the molds in your freezer or refrigerator for 5 or 10 minutes to help them set faster. Once they've set completely, you just pull them right out of the molds. SO EASY!!


Tuesday, March 30, 2010

Eggs, Eggs and more... Eggs?

I think Tuesdays may just be my favorite day of the week. I so look forward to Eli's play group... watching the little ones learn how to interact with each other, seeing each of the children growing as individuals, getting a glimpse of the people they will become as their little personalities develop, and having time to talk with other moms have become moments that I cherish.

This morning, our play group had an easter egg hunt for the kids and they had a marvelous time!


After play group, I drove out to meet my husband for lunch. I had made more delicious treats for him to take to the office, but in a rush to get out the door, he accidentally forgot them. So I drove the 40 minutes it takes to get to his office in Tampa to drop them off, not wanting all that yumminess to go to waste. The staff was literally fighting over them. Curious to know what I made?

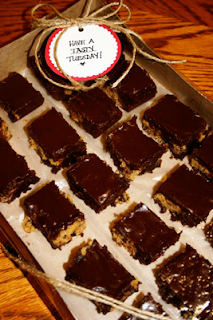
My good friend Betty Crocker came up with a wonderfully simple recipe that had me drooling when my sister first made it a long time ago.... Chocolate Chip Cookie Dough Brownies! Sounds delicious doesn't it? Well, it sounds even better when you add chocolate ganache to the top like I saw on Bakerella (If you haven't visited her blog yet, you should... she has some amazing recipes!). The basic brownie recipe can be found on Betty Crocker's website but here's what you're looking at:

Ingredients:
1 box Betty Crocker Original Supreme brownie mix (with chocolate syrup pouch)
1 pouch Betty Crocker chocolate chip cookie mix
1/3 c. vegetable oil
1/4 c. water
3 eggs
1/2 c. butter or margarine, softened (not melted)
1 container Betty Crocker Rich & Creamy chocolate frosting (I substituted Bakerella's chocolate ganache)


Follow directions on the box to make brownies and pour into greased 13x9 pan. Then, make cookie dough as directed on pouch and drop by rounded spoonfuls into brownie batter (I must have been using a really big spoon, ha ha). Press down lightly.

Bake for 35-40 minutes in a 350 degree preheated oven. Or if you're like me and take everything out earlier than the package says to make sure they're nice and moist, bake them for about 33 minutes =) Place on cooling rack until cooled completely (about an hour).

Then frost them with chocolate frosting or the ganache.

If using the chocolate ganache, you'll want to let it sit until the ganache sets. It seemed to take forever for me, so I ended up sticking it in the refrigerator to help it along. Once set, you can cut them up.

Since I was sending these to work with the hubster, I wrapped them up too (I'm a sucker for pretty packages)...

I baked these the night before sending them off, and my husband and I agreed that they tasted better the next day.

After taking the brownies to Cliff's office, we grabbed some sushi for lunch with Cliff's boss/friend Victor. I ordered an amazing spicy salmon tempura roll, but we all sort of shared our food. After eating a few bites of California roll and a spicy tuna roll (which were both incredible) I was told that the orange stuff on top wasn't seasoning like I had thought, but rather smelt roe. What is smelt roe you ask? Fish eggs. Yes, it's true. I figured that since I'd already eaten them and couldn't really distinguish the difference in texture between the eggs and the rice I'd just continue eating them. I feel tough =)


Sweet Deal

Summer is just around the corner (or already here some days for us Floridians), so I thought I'd share with you my method to making sweet tea. It is seriously the easiest and cheapest stuff to make and my husband goes crazy for it! All you have to do is place 5 tea bags (I use Lipton... SUPER cheap when Publix has their bogo deals) into the basket of your coffee maker. Brew tea with 10 cups of water. Pour over 3/4 to 1 cup of sugar and fill the rest of your 2 quart pitcher with water or ice. Stick it in the refrigerator until it's nice and cold and Voilà! You have an inexpensive, easy, and refreshing beverage. Enjoy! =)

Saturday, March 27, 2010

Fun With Friends And Photos

Today Eli and I got to go to his friend Lennon's first birthday party. Elijah had a great time being outside and playing with all the other toddlers and I had a blast just watching.

Eli, always wanting to be a good helper, decided to help out in opening his little buddy's presents...

On a hot day, there's nothing better than splashing around in cool water! Here's my little man and the birthday boy...


As I mentioned yesterday, I've been working on a project and I am dying to share it with you! Besides giving Lennon an adorable wooden block train, I also made him his own personalized ABC book using photos that I snagged from his parents' facebook and blog pages ;0)


Here are a few of my favorite pages:


It makes a great little gift because it is personal, educational, and it will help keep Lennon familiar with the faces he doesn't get to see very often. It was a huge hit! But I can't take all the credit... as much as I would love to tell you that I was the creative one that thought this up, it was actually the ever-so-talented Cheri from I am Momma Hear me Roar that came up with this genius idea.


Friday, March 26, 2010

One Happy Momma

I just cannot get enough of my adorable son! I was sure today was going to be hectic, with Eli (and myself) not getting enough sleep and me having to rush off for an early doctor appointment (nothing major... just the standard check-up sort). To my surprise, he toughed out an entire day of running around.... Dr. appointment in Spring Hill, lunch with Daddy and our friends Rick & Carolyn in Tampa, and then Walmart... and he did it all with smiles =)

I usually dread those Walmart trips... especially when they're late in the day. I had photos to drop off first, then we headed straight to the baby aisle to get some of Eli's favorite snacks... Gerber's Lil' Crunchies. I browsed while he munched. We had SO MUCH FUN!!! Since we had an hour to kill until our pictures were ready, we spent some time looking at the children's books. It amazes me how much he soaks in. He understands so many words these days and is always eager to point out objects to me. He is 13 months old and can point out the following:

Momma
Dadda
Elijah
Papa
Grandaddy
(we're still working on Grandma and Grammie... although he seems to get it some of the time)
Light
Fan
Night Night (Cliff taught him this.... I tried teaching him bed)
Froggie (his humidifier)
Guitar
Bug (shelf decoration)
Monkey (stuffed animal)
Teddy Bear
Blankie
Balloon
Ball
T.V.
Computer
Food
Drink
Tick Tock (The word my dad taught him for clock *sigh*)
Bird
Dusty (Cliff's parents dog)
Deer (Head mounted on Cliff's parents wall, lol)
Book
Papa's Truck
Car
Shoe

There may be more (he is constantly surprising me with what all he knows) but that's all I can think of at the moment. I am so proud of him =)

Anyway... back to my Walmart story. After perusing the books, we found his favorite.... the balls!!! "Ball" has become one of his favorite words to say and he pointed out every one he saw. We had the cart full of them and he sent me chasing them down the aisles. He would push one out of the cart, I'd go after it with some silly spin and sound effect, and he would just laugh hysterically! Who knew Walmart could be so fun?!

When we got home (with a ball of his choice) we played and cuddled and watched a movie together until Daddy got home. Then it was dinner, more playtime with Daddy, bath and then bed.

I've spent the last couple of hours finishing up a project I've been working on. Will post pictures tomorrow (which means you'll just have to come back... muah ha ha ha ;0)

Now I'm off to spend some time with my wonderful husband. Lucky me!!!! =)


Tuesday, March 23, 2010

Let The Good Times Roll

Today's fun activities for Eli:
Besides going to Starkey Park for our play date which was so much fun that it was followed by a 3 1/2 hour nap (yes, yes... I love Tuesdays ;) I gave the little man some things to explore and discover. He loves going through the kitchen cabinets... particularly the ones that contain tupperware or pots and pans... so I put toys in each individual pot and pan for him to find. It kept him entertained for quite a while and I was able to get some cleaning done =)

Things I'm looking forward to:
Eli's little buddy Lennon is having his first birthday party this Saturday! Watching the little ones interact always brings a smile to face and Lennon's mommy is one of the sweetest women I know.
Also, I'm looking forward to seeing my in-laws on Thursday. I know, those words generally aren't all found in the same sentence but God truly blessed me by allowing me to marry into one of the greatest families ever. I love them like my own flesh and blood.

Words that keep going through my head:
"What can these poor hands lay at the feet of a king?" from the song You Are Good by Nicole Nordeman

Some things I did today to be a help meet to my man:
Cliff called me after work when he was close to home to tell me that he had a horrible day, was suffering from an intense headache, had lots of work to do when he got home, and was starving. I usually do not start making dinner until he gets home because a.) I never know how late he's going to be and b.) he hates reheated food/leftovers. So I quickly tidied up his desk, placed two Advil (is that plural or is it Advils??) next to a glass of water in the middle of his clean work space, and quickly whipped up some grub which was ready shortly after he walked through the door.
Later on, while he was working diligently to provide for our family, he sweetly asked if I would just throw a cup of water in the microwave so he could make himself some instant coffee. He was trying to be nice and not ask for something that would take much time away from whatever I was in the middle of doing. Instead, I made him a cup of his favorite tea. It made him smile, which made my heart happy. Sometimes it's the little things.

Scripture verse:
"A merry heart does good, like medicine, but a broken spirit dries the bones." ~Proverbs 17:22

Things I am thankful for:
1. God is so good and always provides. While we shouldn't be able to make our bills, somehow we always get by.
2. I seriously have the most amazing family and I love them so much!
3. My mac. I know it sounds ridiculous and possibly shallow to say, but I seriously love it and hope I never have to go back to using a pc. Ever. (Plus I know that this comment will score major points with my hubby, lol)
4. The glorious weather we've been having. I don't want it to ever leave.
5. Serving a God that cares about the smallest details of my life.
6. The comfort of p.j.'s and fuzzy socks.

Moments that made me smile:
1. Maybe I'm the only one that does this, but sometimes I just have these times when I think to myself: "Oh my goodness, I am SUCH a mom!" Like it's some huge revelation. I had one of those today as I was making Cliff's salad for lunch tomorrow. When I make salads for Cliff or myself, I usually leave the skin on the cucumbers to add some crunch (and vitamins) and I cut them into bigger chunks. When I cut them for Eli I always take the skin off and cut them into tiny little pieces. After being lost in my own thoughts, I came to the realization that I had cut up the cucumber as if I was making food for my son. Because being a mom has become so natural to me. It amazes me that I am where I am today... when just over a year ago I was struggling to make the transition from being a selfish individual to being a selfless mother.
2. A friend of mine mentioned that if you go to Starbucks today, you get a free pastry with the purchase of a coffee. I had been craving a good cup o' joe and hate to pass up freebies, so I headed down to the local Starbucks where I was informed that the freebie deal ended at 11 am. It was 5 pm. Fortunately for me, the kind barista gave it to me anyway. Good times =)


Monday, March 22, 2010

Happy Mondays

Strangely enough I've had a strong desire to go for a run. So I packed up the kiddo and headed to the park. Never knowing what to expect of Florida's weather, but knowing that I usually end up sweating, I just threw on a pair of shorts and a T-shirt. Silly me. I bundled Eli up in a warm coat and started my brisk walk. Five minutes later, I was headed back to the car completely freezing! Elijah was not happy that I was putting him back in the car so soon. So when we got home, I decided to make the living room his playground. I took all the cushions off the couch and put them on the floor so he would have a few different levels to climb up and down and threw in a bunch of throw pillows. He ended up having tons of fun!


After Elijah went down for a nap, I made some yummy (and super easy) snacks for Cliff to take to work tomorrow to share with the office:

Secret-Center Cookie Cups

Ingredients:
1 roll Pillsbury refrigerated peanut butter cookies
18 mini milky way candy bars
1 container chocolate frosting
18 paper baking cups

Directions:
1. For each cookie cup, wrap heaping tsp. cookie dough around 1 candy bar, enclosing it completely and forming a ball. Place in paper baking cup; place cups 1 inch apart on ungreased cookie sheets.

2. Bake 8-12 minutes or until golden brown (centers will sink slightly). Cool 1 minute; remove from cookie sheets to cooling racks. Cool completely, about 15 minutes.

3. Frost each cookie cup.


This is just my version of the recipe. The original recipe can be found at pillsbury.com. Happy baking! :)

Sunday, March 21, 2010

Break This Big Old Heart

With dull grey skies and the calming sound of rain falling, today was definitely a day I did not want to get out of bed. Especially since all of us are battling colds. But nevertheless, I was out of bed early to get myself and my boys ready for church. After all these years of knowing my husband, I had the opportunity to listen to him formally teach for the first time during this morning's service. I couldn't help but be the proud, admiring wife. There's something very attractive about a man that knows the word of God :)

We enjoyed a relaxing and incredibly lazy afternoon, complete with food I love but should not be eating. I even got a nice, long nap with Eli and Cliff, followed by some cuddles from my smiley little bug...


He makes my heart feel so big!

I've had the song "Hosanna" by Hillsong stuck in my head for over a week now:

"Heal my heart and make it clean.. open up my eyes to the things unseen... show me how to love like You have loved me... break my heart for what breaks Yours... everything I am for Your kingdom's cause... as I walk from earth into eternity."

Every time I hear that part of the song, it speaks powerfully to me. Lately I keep feeling like God is preparing me for something... what it is I'm not sure yet, but I'm excited to see what He has in store!